ken1
Junior Forum Member

Posts: 83  Open to constructive criticism of photos: Yes
|
Post by ken1 on Oct 4, 2015 11:01:53 GMT
|
|
ken1
Junior Forum Member
Posts: 83
Open to constructive criticism of photos: Yes
|
Post by ken1 on Oct 2, 2015 16:01:25 GMT
I thought that would do it but it didn't. I reset preferences, closed down but on the Canvas Size page the "Canvas Extension Color" changed from white to "Background" but it still comes up transparent. That place seems broken. I can't reset it to a color, and resetting my background color makes no difference. It still opens as transparent. I do appreciate all the trouble you took to fix this. It was very kind of you. However, I'm going to open a new page, color it what I want canvas to be, and move the picture onto it, adjust size, and I think I will then be able to apply effects, like drop shadow. It worked once so I'll give it another try today. Thanks for your patience. Berie You're very welcome. You should consider uninstalling and re-installing the program, leaving your antivirus program disabled temporarily. Be sure to turn it on again after the re-installation. |
|
ken1
Junior Forum Member
Posts: 83
Open to constructive criticism of photos: Yes
|
Post by ken1 on Oct 1, 2015 20:48:01 GMT
. I would probably make a new layer beneath my expanded layer and fill it with white. Or, use the paintbucket tool to fill the transparent area with white. |
|
ken1
Junior Forum Member
Posts: 83
Open to constructive criticism of photos: Yes
|
Post by ken1 on Oct 1, 2015 17:27:12 GMT
Mariette, I used the rectangular marquee tool to select the portion of the side window that was not involved with the glare. I placed this on a new layer (CTRL+J) Used the move tool to position the "digital patch" over the area with the glare Sharpened a bit with unsharp mask. 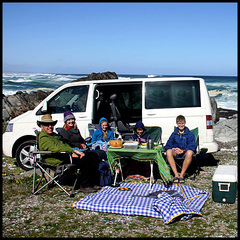 |
|
ken1
Junior Forum Member
Posts: 83
Open to constructive criticism of photos: Yes
|
Post by ken1 on Sept 30, 2015 23:20:53 GMT
You're very welcome. Glad to help.
|
|
ken1
Junior Forum Member
Posts: 83
Open to constructive criticism of photos: Yes
|
Post by ken1 on Sept 30, 2015 12:58:13 GMT
Help! I must have clicked on a wrong setting or something recently. Now, whenever I click on any photo in my files it automatically gets opened in my PSE13 "Quick" section of the editor.  Does anyone know how I can change this back so that when I click on a photo file on my computer it will just open it in windows explorer or wherever to view (like it used to) and then give me the choice of whether to open it in the editor or not? Thanks. Jim, Reset the file association. To do that in WINDOWS, right click on the file's thumbnail. In the menu that comes up, go to Open with>Choose default program. Select the program that you wish to use to open the files. Be sure to check "always use the selected program to open this type of file. That should do it for you. |
|
ken1
Junior Forum Member
Posts: 83
Open to constructive criticism of photos: Yes
|
Post by ken1 on Sept 29, 2015 17:38:05 GMT
Janice,
Step #2. Shut off the visibility of the Background layer by clicking on the eye icon.
|
|
ken1
Junior Forum Member
Posts: 83
Open to constructive criticism of photos: Yes
|
Post by ken1 on Sept 29, 2015 11:51:40 GMT
- Duplicate the background layer
Shut off the visibility of the background layer by clicking on its eye icon. Work on the Background copy layer
Use one of the selection tools to select the object (the person, in your example)
Place the selected object on its own layer (CTRL+J)
Use the move tool to position/manipulate the object
|
|
ken1
Junior Forum Member
Posts: 83
Open to constructive criticism of photos: Yes
|
Post by ken1 on Aug 25, 2015 11:05:05 GMT
vonb, This issue was discussed at length on the old forum. Finally someone (I don't remember who) posted this template as a work-around.  |
|
ken1
Junior Forum Member
Posts: 83
Open to constructive criticism of photos: Yes
|
Post by ken1 on Aug 17, 2015 23:20:34 GMT
Major Major,
Yes, that's the best way to do it.
|
|
ken1
Junior Forum Member
Posts: 83
Open to constructive criticism of photos: Yes
|
Post by ken1 on Aug 17, 2015 20:07:49 GMT
Major Major, Duplicate background layer Shut off visibility of background layer. Work on background copy layer. Get rid of white background with magic wand tool Convert tree to black/white (ALT+CTRL+B) Press CTRI+I to invert Use unsharp mask to sharpen - I used radius=3 Set foreground color chip to green, then use paint bucket tool to fill in area of translucency surrounding tree.  |
|
ken1
Junior Forum Member
Posts: 83
Open to constructive criticism of photos: Yes
|
Post by ken1 on Aug 16, 2015 16:47:46 GMT
You're welcome, Elines. Glad to help.
|
|
ken1
Junior Forum Member
Posts: 83
Open to constructive criticism of photos: Yes
|
Post by ken1 on Aug 16, 2015 13:07:02 GMT
Elines,
Here is a tutorial which you can print out:
You need 2 pictures: The one that you have with the drab sky which you wish to replace, and a picture of a "good" sky - just blue sky with clouds, nothing else on it. You can take the picture of the sky yourself, or download one from another source.
Also, familiarize yourself with the gradient tool, as we will be using this in step #7.
Open your picture (A) (File>open), and open the replacement sky picture (B)
On the sky picture (B), go to Select>all from the menu, then Edit>copy to place it on the clipboard
Go back to your picture (A), then Edit>paste. The new sky (B) should come in on a new layer
With the move tool, use the corner handles to reduce the size of the sky (B) to cover the old sky on (A)
In the layers palette, set the blending mode of (B) to darken
Set the foreground color chip to white
Get the Gradient tool out of the toolbox, and drag a foreground to transparent, linear gradient from below up to the top of the tree line, while holding down the shift key.
With a soft white brush, at reduced opacity, gently paint the horizon a bit, as we want the horizon to be a tad lighter than the rest of the sky.
If necessary, add a few clouds
|
|
ken1
Junior Forum Member
Posts: 83
Open to constructive criticism of photos: Yes
|
Post by ken1 on Jul 22, 2015 16:45:20 GMT
wewah,
Press the Caps Lock key on the keyboard, then use the bracket keys next to the letter P on the keyboard.
This will allow you to engage the mouse and eliminate the gymnastics.
|
|
ken1
Junior Forum Member
Posts: 83
Open to constructive criticism of photos: Yes
|
Post by ken1 on Jul 9, 2015 10:53:22 GMT
The clone stamp is not working. No results after taking a sample when trying to repair. Also, make sure that the layer that you are working on is at 100% opacity. |
|


 Does anyone know how I can change this back so that when I click on a photo file on my computer it will just open it in windows explorer or wherever to view (like it used to) and then give me the choice of whether to open it in the editor or not? Thanks.